sudo yum install -y https://github.com/apache/apisix/releases/download/2.7/apisix-2.7-0.x86_64.rpm
How to Integrate Keycloak for Authentication with Apache APISIX
December 21 2021 by Xinxin Zhu & Yilin Zeng
This post is more than one year old. The content within the blog post is likely to be out of date.
This article shows you how to use OpenID-Connect protocol and Keycloak for identity authentication in Apache APISIX through detailed steps.
Keycloak is an open source identity and access management solution for modern applications and services. Keycloak supports Single-Sign On, which enables services to interface with Keycloak through protocols such as OpenID Connect, OAuth 2.0, etc. Keycloak also supports integrations with different authentication services, such as Github, Google and Facebook.
In addition, Keycloak also supports user federation, and can import users through LDAP and Kerberos. For more information about Keycloak, please refer to the official documentation.
Apache APISIX is a dynamic, real-time, high-performance API gateway, providing rich traffic management. The project offers load balancing, dynamic upstream, canary release, circuit breaking, authentication, observability, and many useful plugins. In addition, the gateway supports dynamic plugin changes along with hot update. The OpenID Connect plugin for Apache APISIX allows users to replace traditional authentication mode with centralized identity authentication mode via OpenID Connect.
How to use
Install Apache APISIX
Install dependencies
The Apache APISIX runtime environment requires dependencies on NGINX and etcd.
Before installing Apache APISIX, please install dependencies according to the operating system you are using. We provide the dependencies installation instructions for CentOS7, Fedora 31 and 32, Ubuntu 16.04 and 18.04, Debian 9 and 10, and macOS. Please refer to Install Dependencies for more details.
Installation via RPM Package (CentOS 7)
This installation method is suitable for CentOS 7; please run the following command to install Apache APISIX.
Installation via Docker
Please refer to Installing Apache APISIX with Docker.
Installation via Helm Chart
Please refer to Installing Apache APISIX with Helm Chart.
Start Keycloak
Here we use docker to start Keycloak.
docker run -p 8080:8080 -e KEYCLOAK_USER=admin -e KEYCLOAK_PASSWORD=password -e DB_VENDOR=h2 -d jboss/keycloak:9.0.2
After execution, you need to verify that Keycloak have started successfully.
docker ps
Configure Keycloak
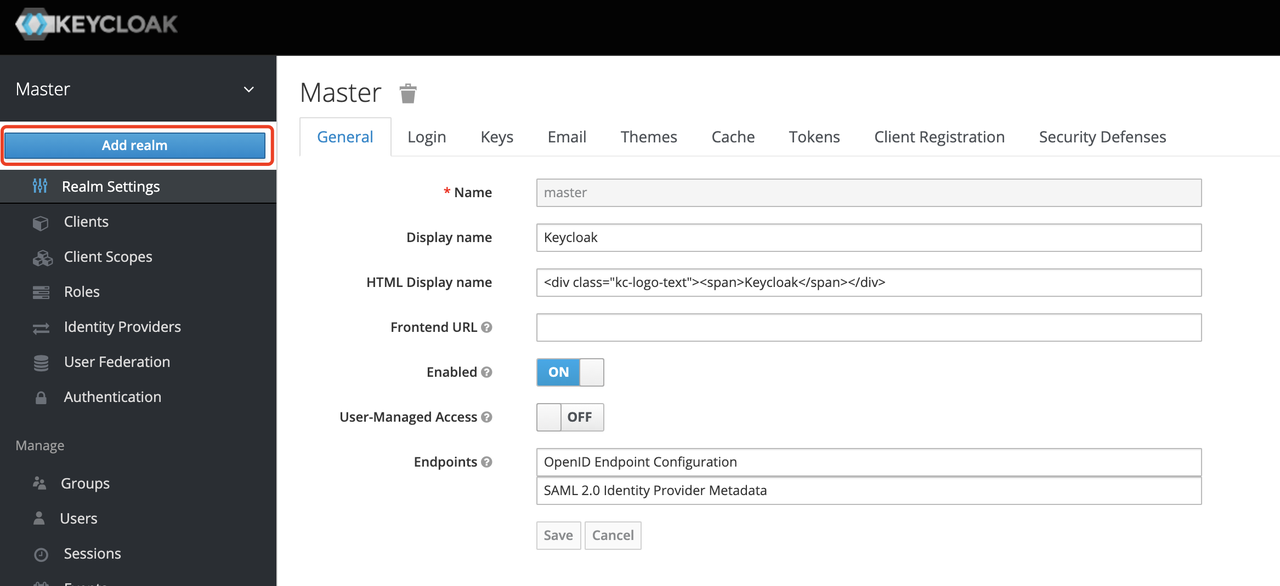
After Keycloak is started, use your browser to access "http://127.0.0.1:8080/auth/admin/" and type the admin/password account password to log in to the administrator console.
Create a realm
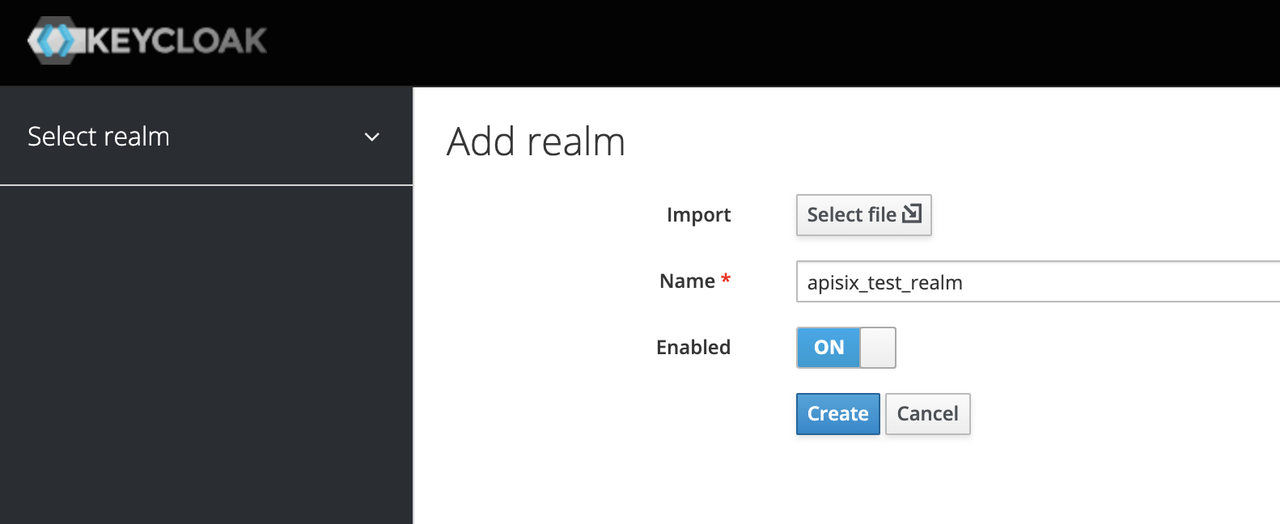
First, you need to create a realm named apisix_test_realm. In Keycloak, a realm is a workspace dedicated to managing projects, and the resources of different realms are isolated from each other.
The realm in Keycloak is divided into two categories: one is the master realm, which is created when Keycloak is first started and used to manage the admin account and create other realm. the second is the other realm, which is created by the admin in the master realm and can be used to create, manage and use users and applications in this realm. The second category is the other realm, created by admin in the master realm, where users and applications can be created, managed and used. For more details, please refer to the realm and users section in Keycloak.
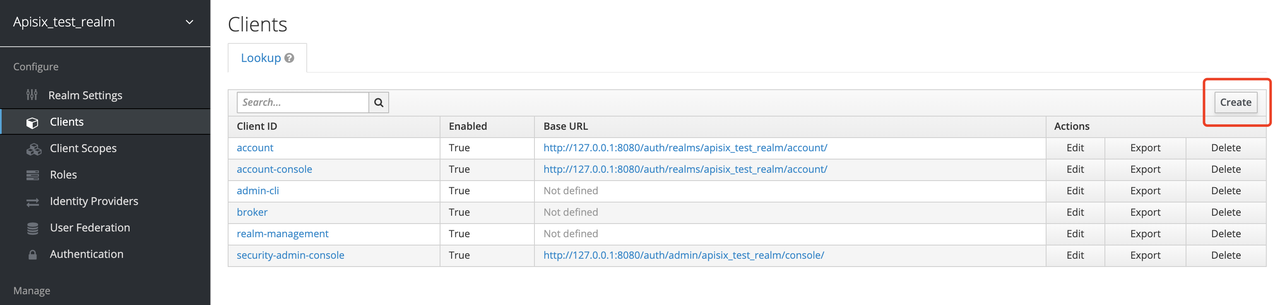
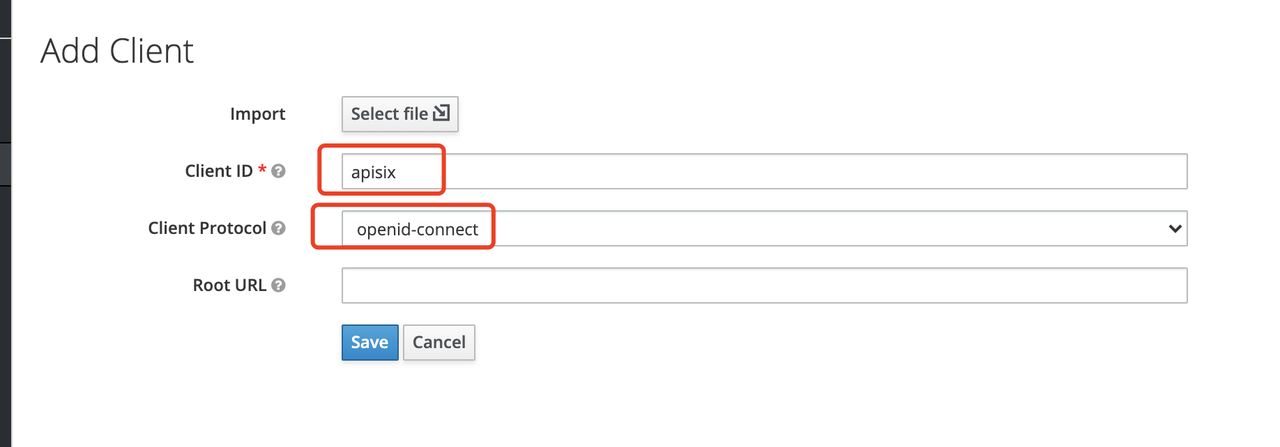
Create a Client
The next step is to create the OpenID Connect Client. In Keycloak, Client means a client that is allowed to initiate authentication to Keycloak.
In this example scenario, Apache APISIX is equivalent to a client that is responsible for initiating authentication requests to Keycloak, so we create a Client with the name apisix. More details about the Client can be found in Keycloak OIDC Clients.
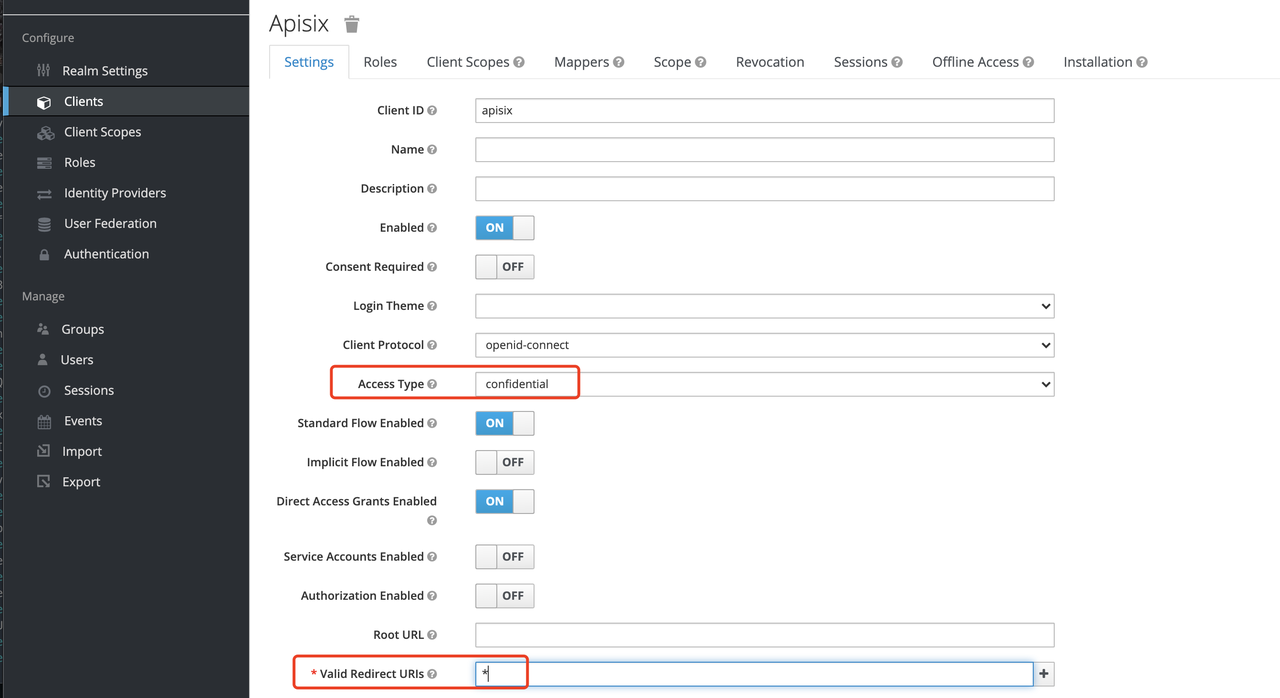
Configure the client
After the Client is created, you need to configure the Apache APISIX access type for the Client.
In Keycloak, there are three types of Access Type:
-
Confidential: which is used for applications that need to perform browser login, and the client will get the
access tokenthroughclient secret, mostly used in web systems rendered by the server. -
Public: for applications that need to perform browser login, mostly used in front-end projects implemented using vue and react.
-
Bearer-only: for applications that don’t need to perform browser login, only allow access with
bearer token, mostly used in RESTful API scenarios.
For more details about Client settings, please refer to Keycloak OIDC Clients Advanced Settings.
Since we are using Apache APISIX as the Client on the server side, we can choose either "Confidential" Access Type or "Bearer-only" Access Type. For the demonstration below, we are using "Confidential" Access Type as an example.
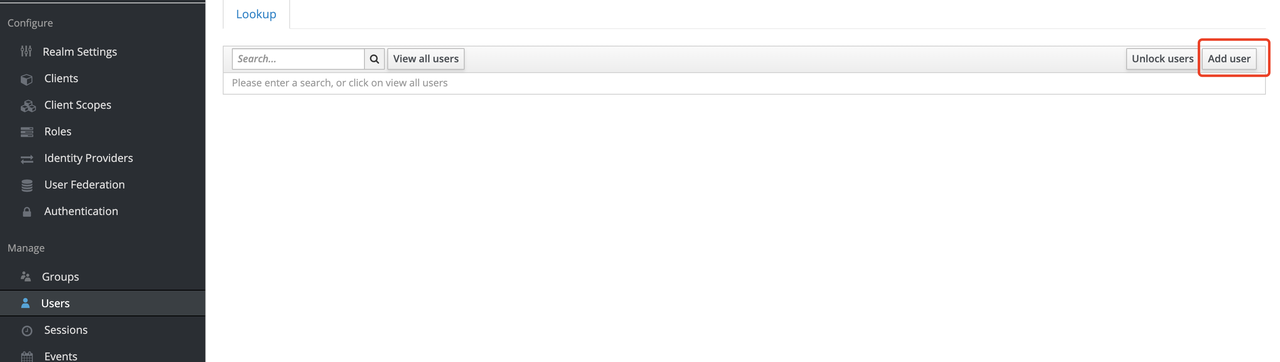
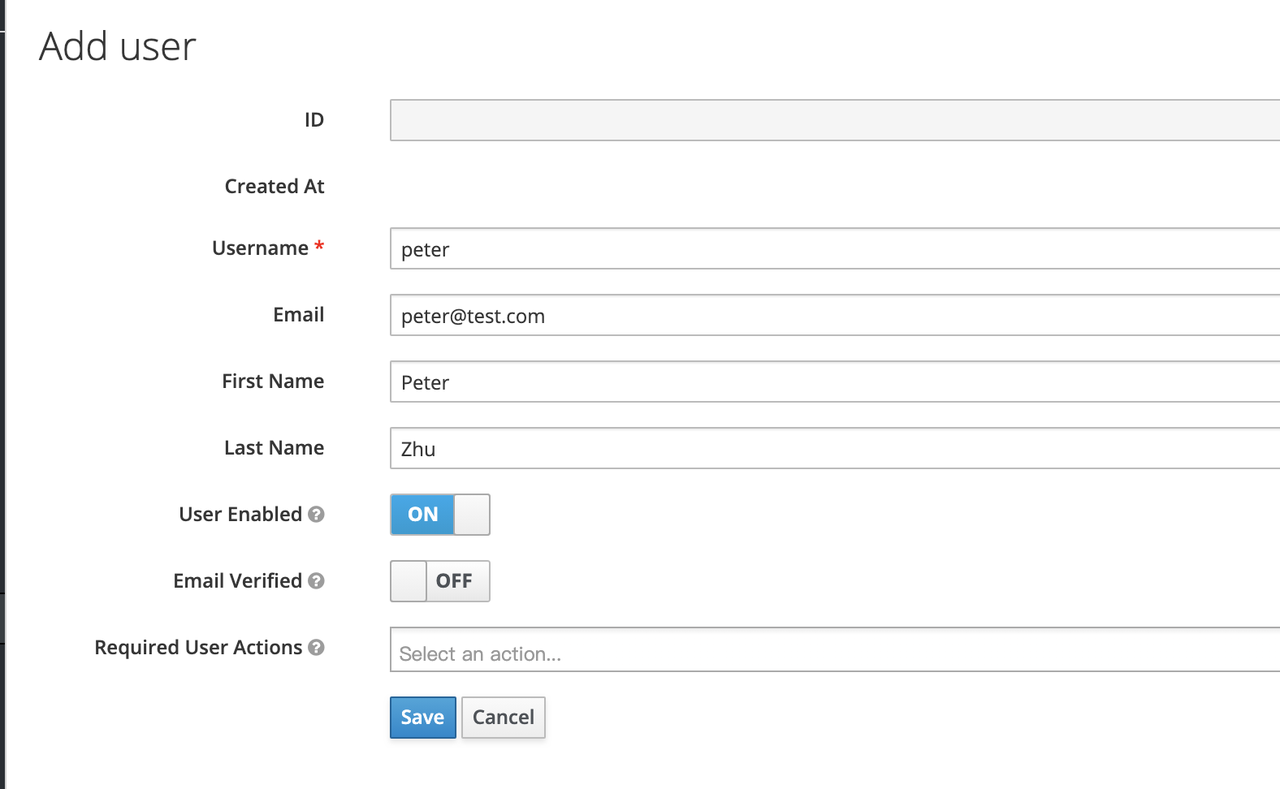
Create Users
Keycloak supports interfacing with other third-party user systems, such as Google and Facebook, or importing or manually creating users using LDAP . Here we will use "manually creating users" to demonstrate.
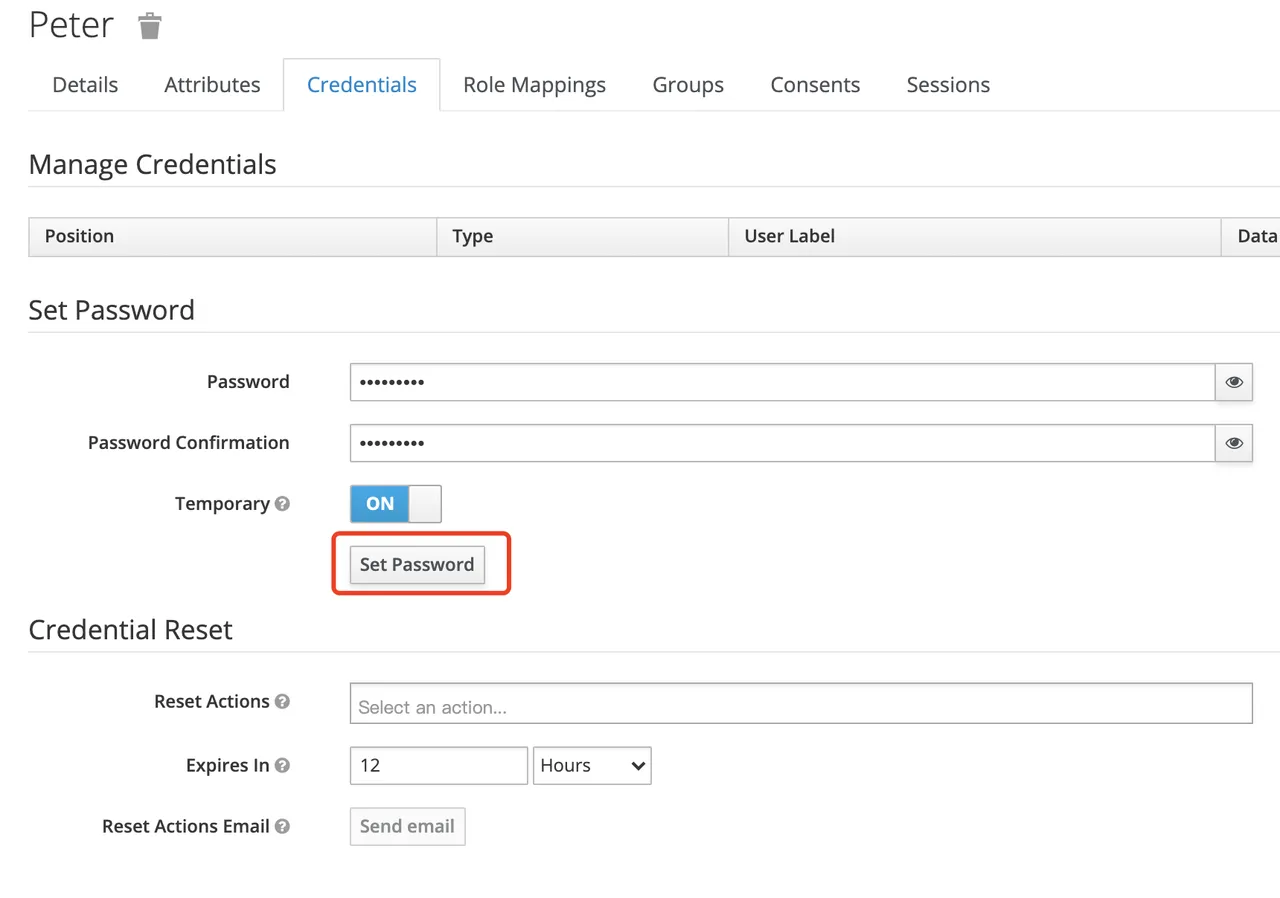
Then set the user’s password in the Credentials page.
Create Routes
After Keycloak is configured, you need to create a route and open the Openid-Connect plugin . For details on the configuration of this plugin, please refer to the Apache APISIX OpenID-Connect plugin.
Get client_id and client_secret

In the above configuration.
-
client_idis the name used when creating the Client before, i.e.apisix -
client_secretshould be obtained from Clients-apisix-Credentials, for example:d5c42c50-3e71-4bbbe-aa9e-31083ab29da4.
Get the discovery configuration
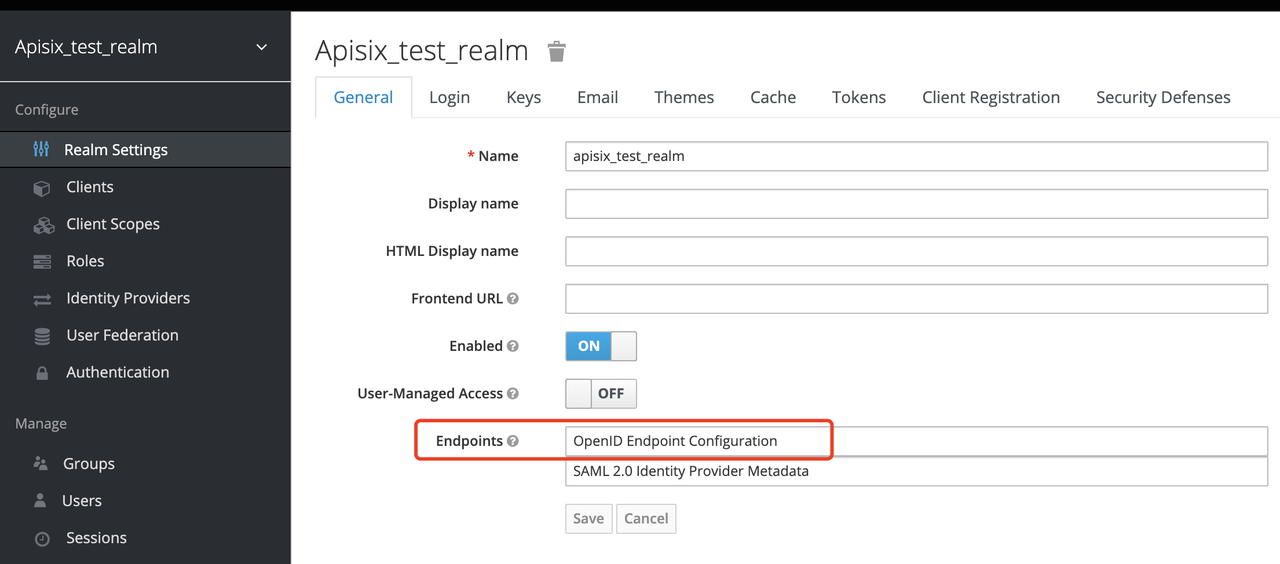
Go to Realm Settings-General-Endpoints, select the OpenID Endpoint Configuration link and copy the address that the link points to, for example:`http://127.0.0.1:8080/auth/realms/apisix_test_realm/.well-known/openid-configuration`.
Create a route and enable the plug-in
Use the following command to access the Apache APISIX Admin interface to create a route, set the upstream to httpbin.org, and enable the plug-in OpenID Connect for authentication.
Note: If you select bearer-only as the Access Type when creating a Client, you need to set bearer_only to true when configuring the route, so that access to Apache APISIX will not jump to the Keycloak login screen.
curl  -XPOST 127.0.0.1:9080/apisix/admin/routes -H "X-Api-Key: edd1c9f034335f136f87ad84b625c8f1" -d '{
    "uri":"/*",
    "plugins":{
        "openid-connect":{
            "client_id":"apisix",
            "client_secret":"d5c42c50-3e71-4bbe-aa9e-31083ab29da4",
            "discovery":"http://127.0.0.1:8080/auth/realms/apisix_test_realm/.well-known/openid-configuration",
            "scope":"openid profile",
            "bearer_only":false,
            "realm":"apisix_test_realm",
            "introspection_endpoint_auth_method":"client_secret_post",
            "redirect_uri":"http://127.0.0.1:9080/"
        }
    },
    "upstream":{
        "type":"roundrobin",
        "nodes":{
            "httpbin.org:80":1
        }
    }
}'
Access Testing
Once the above configuration is complete, we are ready to perform the relevant access tests in Apache APISIX.
Access Apache APISIX
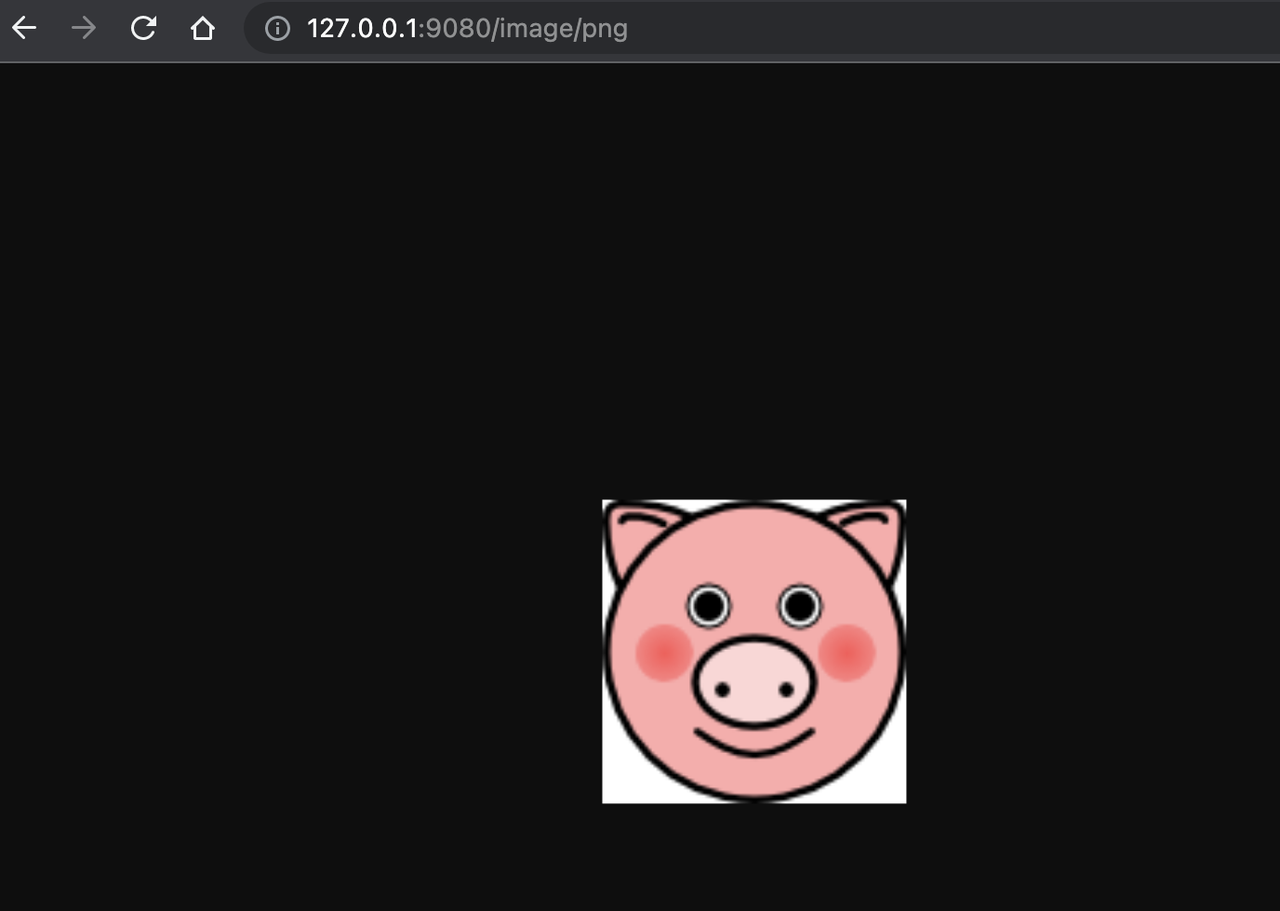
Use your browser to access http://127.0.0.1:9080/image/png.
Since the OpenID-Connect plugin is enabled and bearer-only is set to false, when you access this path for the first time, Apache APISIX will redirect to the login screen configured in apisix_test_realm in Keycloak and make a user login request.
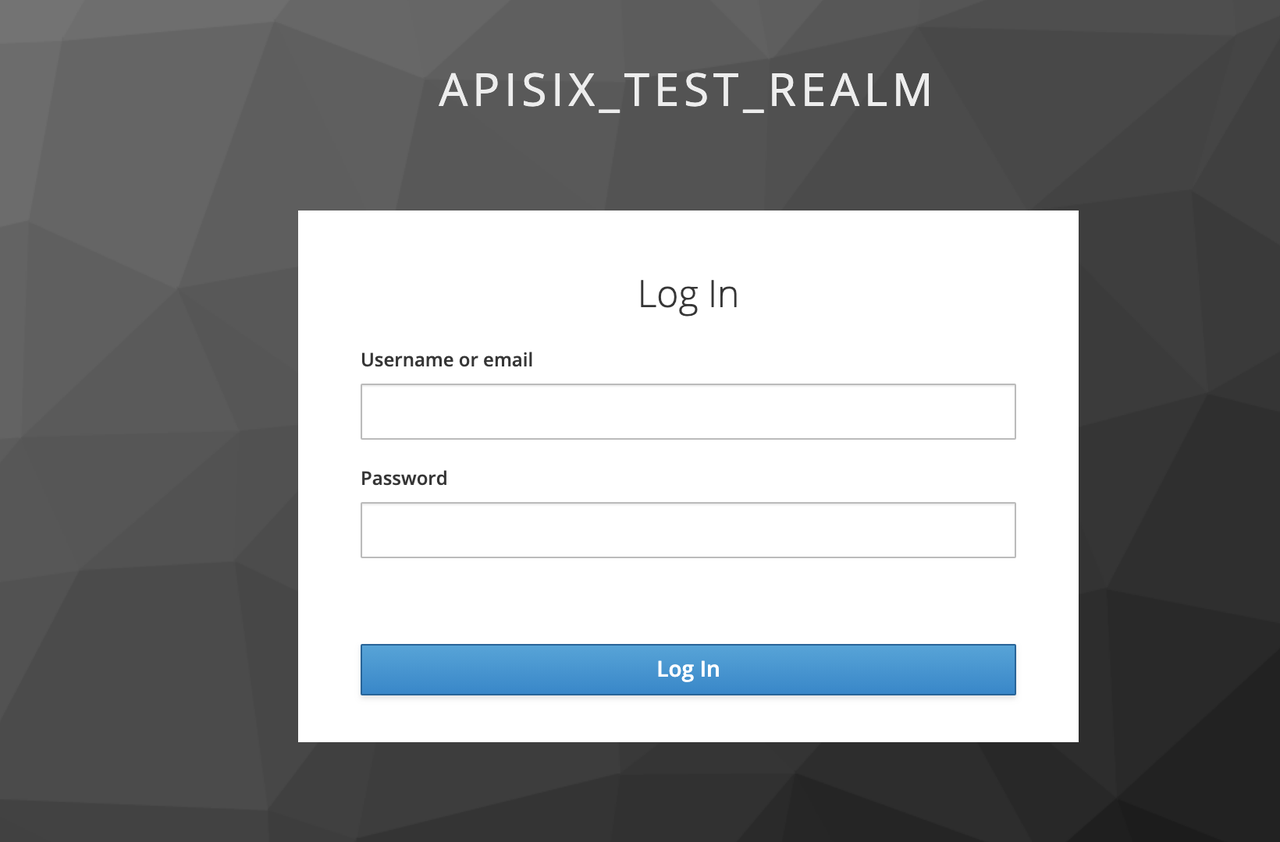
Enter the User peter created during the Keycloak configuration to complete user login.
Successful access
After a successful login, the browser will again redirect the link to http://127.0.0.1:9080/image/png and will successfully access the image content. The content is identical to that of the upstream http://httpbin.org/image/png.
Summary
This article shows the procedure of using OpenID-Connect protocol and Keycloak for authentication in Apache APISIX. By integrating with Keycloak, Apache APISIX can be configured to authenticate and authenticate users and application services, which greatly reduces the development work involved.
For more information about the implementation of authentication in Apache APISIX, see Apache APISIX Blog.