
Nightly release
This guide is for the unstable nightly release, for the latest release go here.OAuth Identity and Authorization Chaining Across Domains
Guide for the draft about OAuth Identity and Authorization Chaining Across Domains.Applications can require access to resources that are distributed across multiple trust domains where each trust domain has its own OAuth 2.0 authorization server. A request may transverse multiple resource servers in multiple trust domains before completing.
The OAuth Identity and Authorization Chaining Across Domains is a draft specification that refers to this scenario as chaining. It defines a common pattern for combining two standards:
-
OAuth 2.0 Token Exchange (RFC8693) to produce a JWT assertion targeted at the destination domain.
-
JWT Profile for OAuth 2.0 Client Authentication and Authorization Grants (RFC7523) to convert the assertion into a valid access token in the destination domain.
The following diagram illustrates the steps that the client in trust domain A needs to perform to access a protected resource in trust domain B.
Figure 1. Identity and Authorization Chaining Flow
-
The client in trust domain A discovers the location of the authorization server of trust domain B.
-
The client in trust domain A exchanges a token it has in its possession with the authorization server in trust domain A for a JWT authorization grant that can be used at the authorization server in trust domain B.
-
The authorization server of trust domain A processes the request and returns a JWT authorization grant that the client can use with the authorization server of trust domain B.
-
The client in trust domain A presents the authorization grant to the authorization server of trust domain B.
-
Authorization server of trust domain B validates the JWT authorization grant and returns an access token.
-
The client in trust domain A uses the access token received from the authorization server in trust domain B to access the protected resource in trust domain B.
Keycloak can implement OAuth Identity and Authorization Chaining Across Domains between two different realms or servers by combining the following supported features:
-
Token Exchange: Used in domain A to produce a JWT assertion for domain B. Domain B is configured as an audience that can be restricted via token exchange. See Configuring and using token exchange for more information.
-
JWT Authorization Grant: Used in domain B to validate the assertion and issue an access token. Domain A is configured as an Identity Provider that is used to validate the assertion. See JWT Authorization Grant for more information.
| OAuth Identity and Authorization Chaining Across Domains is still in draft, it is not yet a definitive standard. |
Overview of the complete flow
To access resources in domainb from a client authenticated in domaina, you need to complete these three steps:
-
Obtain token1: Get an initial access token from
domaina(via normal OAuth flow). -
Token Exchange: Exchange token1 in
domainato get token2 (a JWT assertion fordomainb). -
JWT Authorization Grant: Present token2 to
domainbto get token3 (the final access token fordomainb).
Step 1: Configure Token Exchange in domaina
In this sample configuration two realms, domaina and domainb, are used to represent the domains involved in the chaining diagram. This step configures domaina to enable a client to request a Token Exchange for domainb. The result will be a JWT assertion that can be used for JWT Authorization Grant in domainb.
For more information about Standard Token Exchange, see Configuring and using token exchange.
1.1 Create a client that represents domainb
This client will also be the client configured in domainb for the identity provider access. Go to Clients and click Create Client.
-
Client ID: http://localhost:8080/realms/domainb (issuer for
domainb). -
Name: domainb
-
Enable Client authentication. The credential will be used to configure the Identity Provider in
domainb. -
Valid redirect URIs: http://localhost:8080/realms/domainb/broker/domaina/endpoint/* (IdP endpoint in
domainb) -
Valid post logout redirect URIs:
+

Figure 2. Client that represents domainb in domaina
1.2 Create a client scope to grant access to domainb
Create a client scope access-domainb to include the correct audience for the token when this scope is requested. An audience mapper for domainb will be added. In Client scopes, click Create client scope.
-
Name: access-domainb
-
Type: None
-
Only enable Include in token scope (disable Display on consent screen and Include in OpenID Provider Metadata).
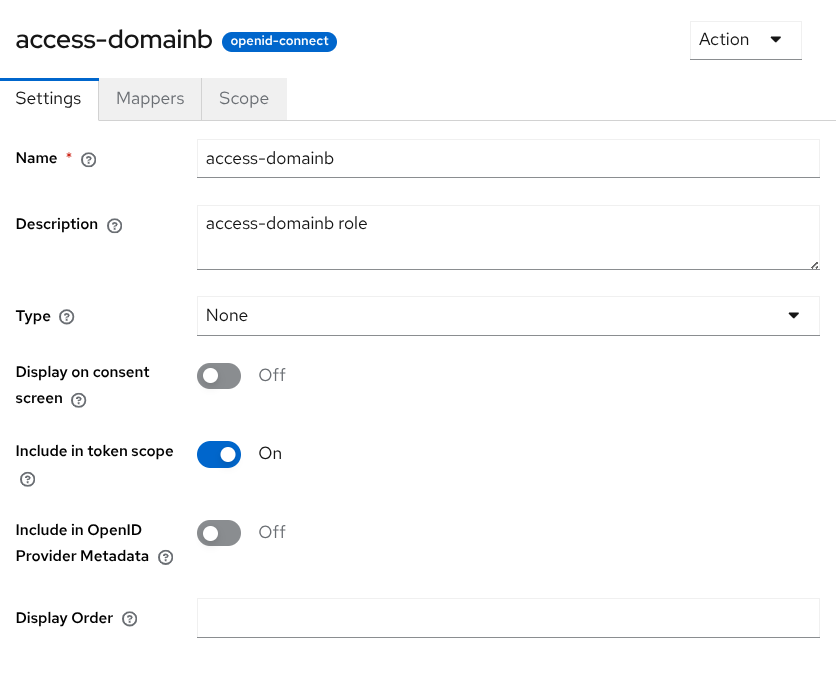
Figure 3. Client scope to include domainb as audience
In the Mappers tab, click Configure a new mapper and select Audience:
-
Mapper type: Audience
-
Name: domainb-audience
-
Included Client Audience: http://localhost:8080/realms/domainb
-
Add to access token: On
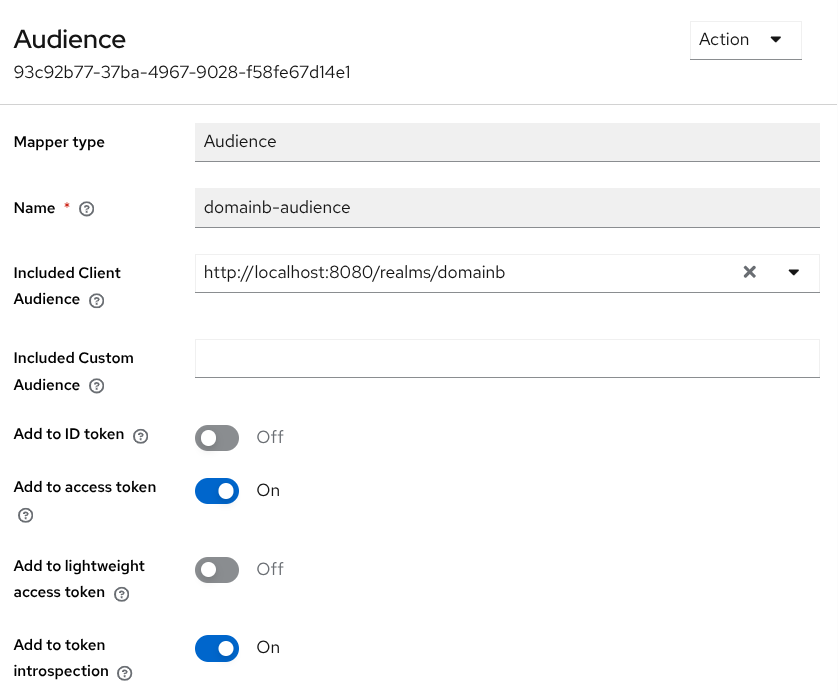
Figure 4. Client scope mapper for domainb audience
This example allows any user to request that client scope. Roles can be used to restrict the scope of the client scope. This way only users with a specific role would be allowed to add the domainb audience.
|
1.3 Create a client to perform the Token Exchange
Create a confidential OpenID Connect client clienta with Standard flow, Direct access grants and Standard token exchange capability enabled.
-
Client ID: clienta
-
Name: clienta
-
Enable Client authentication.
-
Enable capabilities Standard flow, Direct access grants and Standard token exchange.
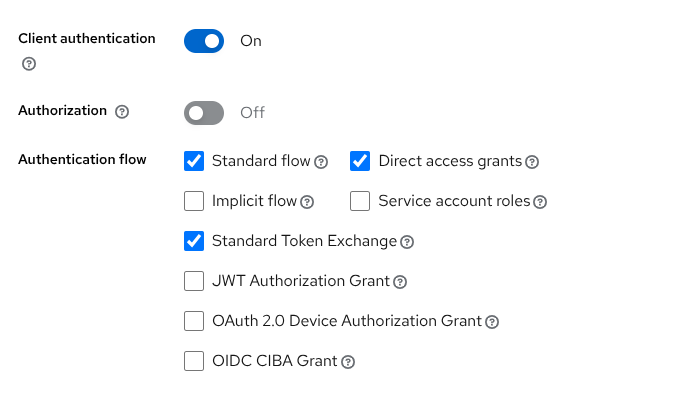
Figure 5. Client for token exchange
In the tab Client scopes, assign the previous access-domainb scope as optional to clienta. Click Add client scope, select access-domainb and Add as Optional.
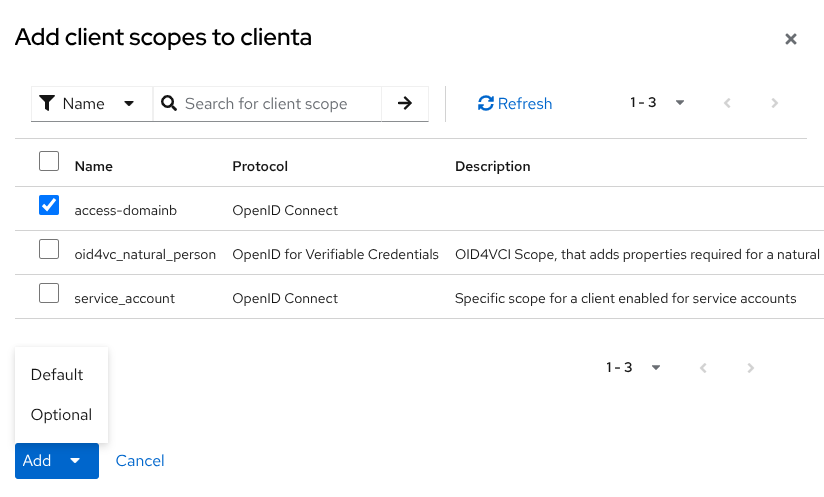
Figure 6. Add client scope as optional
1.4 Create a sample user
Finally create a sample user in domaina with username testuser. Set a password to the account.
1.5 Test Token Exchange
Normally clienta will possess an initial token issued by domaina, obtained via normal authorization flow, or just because the client is a service endpoint that receives the token as a bearer. In this example, a direct access grant for testuser is requested to get token1.
curl -s -X POST \
  --location http://localhost:8080/realms/domaina/protocol/openid-connect/token \
  --header "Content-Type: application/x-www-form-urlencoded" \
  --data-urlencode "client_id=clienta" \
  --data-urlencode "client_secret=XXXXXX" \
  --data-urlencode "grant_type=password" \
  --data-urlencode "username=testuser" \
  --data-urlencode "password=YYYYYY"
Now clienta can exchange the token, including scope access-domainb, and restricting the audience to http://localhost:8080/realms/domainb (issuer of domainb).
curl -s -X POST \
  --location http://localhost:8080/realms/domaina/protocol/openid-connect/token \
  --header "Content-Type: application/x-www-form-urlencoded" \
  --data-urlencode "client_id=clienta" \
  --data-urlencode "client_secret=XXXXXX" \
  --data-urlencode "grant_type=urn:ietf:params:oauth:grant-type:token-exchange" \
  --data-urlencode "subject_token_type=urn:ietf:params:oauth:token-type:access_token" \
  --data-urlencode "scope=access-domainb"  \
  --data-urlencode "audience=http://localhost:8080/realms/domainb" \
  --data-urlencode "subject_token=$token1"
The resulting token token2 is a JWT assertion (not a bearer token) that must be presented to domainb via JWT Authorization Grant to obtain a valid access token.
You have now completed the configuration in domaina. Next, you need to configure domainb to accept the JWT assertion and convert it into a valid access token.
Step 2: Configure JWT Authorization Grant in domainb
This step configures domainb to accept a JWT authorization grant using the assertion obtained via Token Exchange in domaina. This is required to convert the assertion into an access token that is valid for domainb and trusted by its resource servers.
For more information about JWT Authorization Grant, see JWT Authorization Grant.
2.1 Create an OpenID Connect Identity Provider for domaina
Create a Identity Provider to establish the trust relationship with domaina. In Identity providers, click the OpenID Connect v1.0 type.
-
Alias: domaina
-
Discovery endpoint: http://localhost:8080/realms/domaina/.well-known/openid-configuration (load OpenID metadata from the discovery endpoint of
domaina) -
Client ID: http://localhost:8080/realms/domainb (client created in
domainathat representsdomainb) -
Client Secret: <copy the secret for the client>
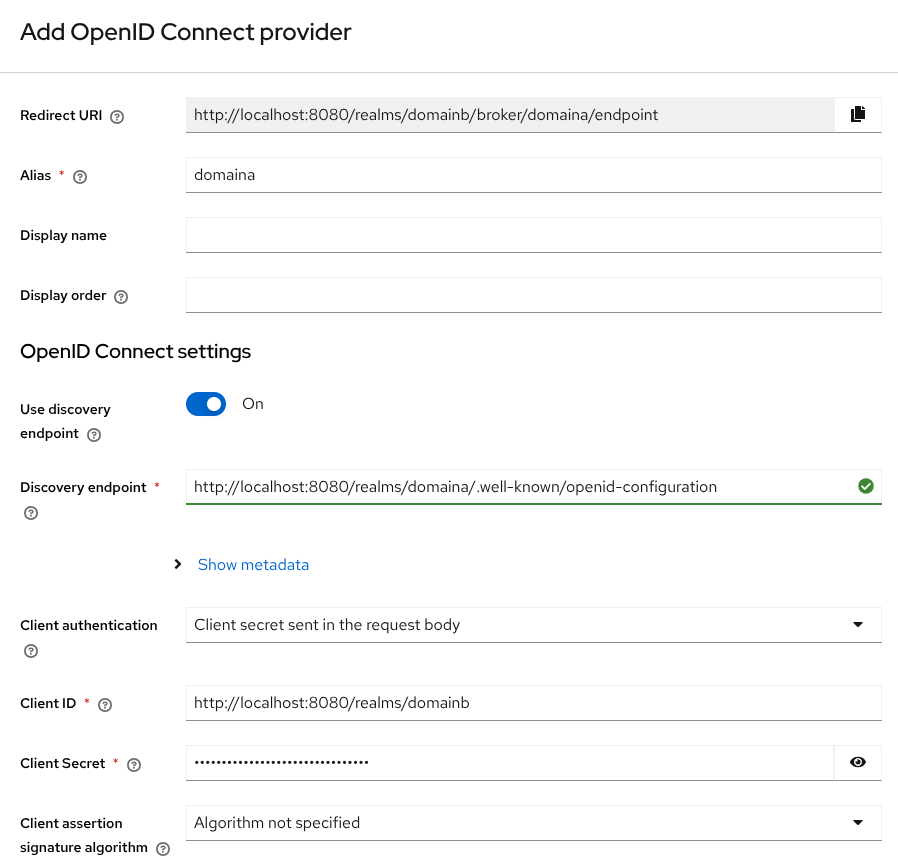
Figure 7. Identity Provider for domaina
After creation, enable the JWT Authorization Grant option.
This option must be enabled to allow the Identity Provider to accept JWT assertions from domaina and convert them into access tokens.
|
2.2 Create a client to perform the JWT Authorization Grant
Create a confidential OpenID Connect client clientb with JWT Authorization Grant capability enabled. In the option Allowed Identity Providers for JWT Authorization Grant add the domaina Identity Provider.
-
Client ID: clientb
-
Name: clientb
-
Enable Client authentication.
-
Enable JWT Authorization Grant capability.
-
Allowed Identity Providers for JWT Authorization Grant: domaina
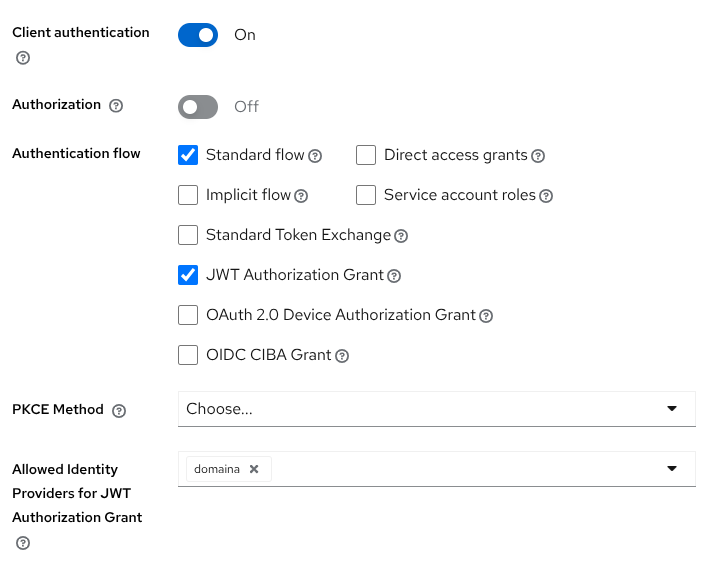
Figure 8. Client for JWT authorization grant
2.3 Link the sample user in domainb
To test the JWT Authorization Grant, the sample user created in domaina should be linked in domainb. You can just access to the account page in domainb:
-
In a browser go to the account page in
domainb: http://localhost:8080/realms/domainb/account -
Click
domainabutton to use the Identity Provider to login. -
The browser is redirected to login page in
domaina. -
Log in using the test user and the password assigned previously.
-
Check in Account security → Linked accounts that the user is correctly linked to
domaina.
2.4 Test JWT Authorization Grant
The token2 obtained in Test Token Exchange is a valid assertion for domainb. The clientb defined in domainb can send a JWT Authorization Grant request with that token.
curl -s -X POST \
  --location http://localhost:8080/realms/domainb/protocol/openid-connect/token \
  --header "Content-Type: application/x-www-form-urlencoded" \
  --data-urlencode "client_id=clientb" \
  --data-urlencode "client_secret=ZZZZZZ" \
  --data-urlencode "grant_type=urn:ietf:params:oauth:grant-type:jwt-bearer" \
  --data-urlencode "scope=profile" \
  --data-urlencode "assertion=$token2"
The response will contain a new access token (token3) issued by domainb. This token3 is the final access token that can be used as a Bearer token to access protected resources in domainb.
On this page